We are moving!!! Same Fun, Crafts, and Recipes, but a new and official web address! Come check out what is new at...


FunOnaDime.net


See you there!
Showing posts with label Preschool. Show all posts

Preserving Leaves and the Fall Colors

All Fall we have been waiting for the leaves to change colors and fall off the trees. They finally decided to change colors a couple of weeks ago and over the weekend they all started blowing away. We were able to grab some of our favorite colors and we attempt to preserve them.


READ MORE on how to preserve your Fall leaves over at my new official site funonadime.net

The Best Flying Paper Airplane

This is the first post that I ever wrote on this blog. I thought it would be fun to bring a little blast from the past (9 months ago!).

This is the best paper airplane we have ever flown and very easy to fly. Paper airplanes are a great activity for those days when you can not go outside or are confined to a small space, like the gym childcare area. They are simple, you most likely have all the supplies you need on hand and are always a huge hit for any age. I did this with ages 2-4 years old. My 13 year old sister and 3 of her friends even tested it out for me. They had so much fun that they played with them for 3 hours and I was told they had a blast. They ended up naming their planes and having all sorts of competition.


What You Need:

  • Paper
  • Tape
  • Crayons (optional)

Directions:
First, we had to add a little color before we started folding. Notice how the boys were all about getting it done as fast as possible. The girls were a little more detailed oriented when it came to coloring!


Once that is done, the folding begins. Each step has a number next to the picture to make it a little easier to follow. I also colored the back side of the paper green, so you can tell which side is which while we are folding.

Let's begin! Each picture is number for the Step that it belongs to. For instructional purposes, one side is white and the other is green scribbles. If you would like a larger view, click on the picture.

Step 1: Lay paper on a flat surface. (See picture below)

Step 2: Fold the paper length wise in half. (See picture below)

Step 3: Open the paper up again. Take one corner and fold it in towards the center line. (See picture below)

Step 4: Do the same to the opposite corner.


Step 5: Flip the paper over. (See picture below)

Step 6: Pull the new corner, just created in and in line with the center line.(See picture below)

Step 7: Do the same to the opposite corner.(See picture below)

Step 8: This is what it should look like right now when it is folded in half.


Now this next part is a little tricky, so much sure you follow the pictures

Step 9.1: I put 2 red dots on the paper. See them? On the next fold, you will bring the red dots together by bringing the edge on the bottom up. Basically folding it in half on the one side. (See picture below)

Step 9.2: I guess to make it easier on me I flipped it around and I didn't notice it until now. Sorry! This picture is folding the edge (that is pictured in 9.1 on the bottom) to line up with the opposite edge. (See picture below)

Step 10: Flip the plane over and do the same to the other side.


Step 11: This is what your plane should look like from the side when your hand is holding the fold. Now you want to put a little piece of tape on the bottom going over the fold . Somewhere near my thumb is fine. (See picture below)

Step 12: You also want to put a piece of tap on the top holding the two sides together. About where the red line is.


Step 13: Have some fun! We did!

Getting ready to have a throwing competition!

And they are off!

Enjoy!


** This original post was posted on January 22, 2010. I rewrote it a little so it could match my formatting I have adopted over the past 9 months of writing my blog and moved some pictures around. At the time I thought it would work well to put 3-4 pictures together in one, but now going over it, I think it may be better to have the pictures separated. .I am participating in the SITS Girls Back to Blogging Event with their sponsors Standards of Excellence, Westar Kitchen and Bath, and Florida Builder Appliances.

Monkey Faces


You may not be able to tell exactly what these are because the kiddos added their own artistic touch to them. But, we had a lot of fun making these monkey faces. It was simple, we had all the supplies we needed on hand and they loved playing with them afterwards. They especially liked singing/acting out "Monkeys jumping on the bed" and "Monkeys swinging in a tree" songs were a big hit afterwards!


What You Need:
  • A stiff circle (We used a bowl to trace a circle onto a cereal box)
  • A craft stick or plastic spoon (or a real spoon)
  • Glue
  • Crayons
  • Scissors
  • Printer (unless you make your own)
  • Monkey face parts from DLTK
  • Paper

Directions:

Step 1: This site has lots of fun printouts, but if you do not have a printer make your own. They are pretty simple. Print them out and have them cut and ready. Be sure to cut the eyeball (the smaller circle) out from the printout. I printed them on card stock, so they were stiffer.

Step 2: Create your circle. An empty cereal box worked great. If your kids are old enough, let them help you cut them out. We had a Cheerios box that fit 1 circle perfectly on each side, but we had to use a smaller box for the 3rd circle and so it had a crease in it. I put the crease near the bottom of the mask so the stick will keep that part from bending.

Step 3: Let your little creators color their monkey face parts. This is a great opportunity to talk about faces and where everything belongs on a face.


Step 4: Cut 2 holes in the mask for eyes and 2 slits starting an inch from the bottom for the stick (see picture in Step 5). I held the circle up to their face and put an x with a pencil where their eyes were and then that is where I started my circle for the eyes. The eye cut outs do not have to be pretty.

Step 5: Insert stick and tape on the back of the mask to secure it. You will be weaving the stick through the 2 slits created in Step 4.


Step 6: Glue all the pieces to the mask.


Step 7: Have fun and play monkey games and songs! And do not forget that you can make one for yourself, too!


ENJOY!!!

Ice Breaker Experiment


{**GiVeAwAy** $40 CSN Stores Gift Card - Leave a comment}

~~~~~~~~~~~~~~~~~~~~~~~~~~~~~~~~~~~~~~~~~~~~~~~~~~~~~~~~~~~~~~~


This project originally started out with a science experiment that I thought would be a little difficult for my kids to understand. Did  you know salt water does not freeze? The suggestion for the experiment was to freeze regular water in half of an ice cube tray and in the other half freeze salt water. After a couple of hours when you pull the ice out, you would see that the regular water melts and the ice water does not melt. So, I came up with this variation for the kids to play around with....


What You Need:
  • Salt
  • Water
  • Little bowls or plates
  • Mini toys or small objects
  • Container - size depends on how big you want your block of ice to be
  • Ice cubes
  • Optional: random tools or kitchen gadgets

Directions:

Step 1: Make a large ice block in a large container (mine was not huge, just a storage container). i filled it with cold water and mini toys and/or objects (mini Lego men, pen top, crayon, a glow in the dark snake, money - some sink, some float, just stuff that is on hand!). I added lots of ice to speed up the process and then put it in the freezer. The ice helped keep the toys separated and at various levels and it froze in just over 1.5 hours. 

Step 2: I started out giving a small bowl with a piece of ice to each child. Then I gave them some sugar to sprinkle on the ice to see what happens


Step 3: Then I gave them some salt. Wit the salt the ice starts melting quickly. We talked about what they saw and made sure they all noticed the ice melting quickly.


Step 4: After experimenting, I pulled out the big block of ice that I created and put it on the table in front of them. They saw their toys and the money and got really concerned and wanted to get them out! So, I had them tell me what they could do to get them out.


They tried knives...


Then they decided that forks might be better. I had to give each of them a turn to chip away at it because they were getting a little scary. They really enjoyed this part a little too much!


I reminded them of the little ice cubes and then they asked for the salt.

They each got a turn to sprinkle (and they wanted to keep stabbing it with the forks, too.)


It was a slow process, but they had a lot of fun. Once it started melting, it really started shrinking.


Next time I am going to make a really huge block of ice or make multiple ones of the one above and let the kids at them in the backyard. The 20-30 minutes we spent on breaking up this ice block was not enough for them!

It was fun for all who watched and participated!

This is the underside once we were able to flip it over.

ENJOY!!


Oh, and check out here to get a code for a Free Month Membership to Readeo.com


Storytime Online


Hands and Feet to Keep

{Enter to win a $40 CSN Stores Gift Card - Leave a comment}

~~~~~~~~~~~~~~~~~~~~~~~~~~~~~~~~~~~~~~~~~~~~~~~~~~~~~~~~~~~~~~~

We made these while we were discussing hands and feet, but I think they would make a great present for any mom, dad, or grandparent or great as a keepsake! Super easy to make and the kids had fun decorating them after they dried.


What You Need:
  • 2 c. flour
  • 1/2 c. salt
  • 3/4 c. warm water
  • Large bowl
  • Mixing spoon
  • Baking Sheet
  • Rolling pin or solid cup (I prefer the cup to the rolling pin)
  • Food coloring (optional)
**makes enough for one foot and hand print together or two separate hand/footprints


Directions:

Step 1: Mix ingredients together in a bowl. If the dough is a little dry add water a little at a time. **optional** Mix in food coloring to color the dough.


Step 2: Make a ball of dough, then flatten it to about a one-inch thickness in the shape of a circle. I recommend sticking to the 1 inch thickness. I tried to do less than an inch thick and once the hand/foot prints were finished, it was very thin on the bottom. 


Step 3: Place the dough on a baking sheet, if you have not already. Put the baking sheet on a hard surface like a tile floor or pavement. Press the hand and/or foot into the dough to make an imprint. I pressed on every toe and finger and made sure their palm/heel got a good push into the dough.


Step 4: If you want to add a name or a date, the easiest way is to use a toothpick and poke words/date in with many little dots. I tried a few different ways (knifes and dragging the toothpick) and it just kept tearing the dough. (see below picture)


Step 5: Bake at 325 degrees in the oven until hard or let it air dry a couple of days. Once baked, it comes off the pan easily. I recommend baking. I baked one of them right away and let the other two air dry. The one I left in the oven I finally took it out after 30 min and let air dry the rest of the way (it probably could have baked another 10-15 min). The other  two started to color oddly and stick to the pan while air drying after a couple of days, so I threw them in the oven for 20 minutes to bake. They get brown underneath but not on top and they didn't stick to the pan once baked.

This is what it looked like after it was finished baking

Step 6: Paint and decorate as you like. I like to let them paint with cue tips, then I do not have to worry about them damaging the few brushes we have while they are painting on this hard surface.


Step 7: Get excited about what you were able to create! **Warning** Mold will break when tossed! After this picture was taken, my son was so excited that he tossed his mold onto the table without thinking about it and it cracked. = (  He now knows to be careful!


Enjoy!

B is for Beads and Bracelets

{Leave a comment to win the Giveaway}

As part of our summer activities I have started to work through the alphabet with my children and a few friends. We have been doing 2 or 3 things per letter (on different days). Sometimes it is a craft, sometimes it is a food thing and sometimes it is something entertaining to do. So far, we have been having a lot of fun with it.


For the letter B we made Bead Bracelets with pipe cleaners. It ended up being a lot of fun and they were all so proud of their final project. Because we used pipe cleaners, even the 2.5 year olds were able to do it on their own with a little help to start out. Best part of this project is that it was pretty cheap. A little bag of 500 beads cost me less than $2 and I almost have a whole bag left!


I think we will have to do this again soon, since this is my daughter favorite piece of jewelry and she has been wearing it every day since we made them!


What You Need:
  • Beads
  • Pipe Cleaner (or yarn/string)

Directions:

It's pretty simple to figure out what to do. You just need to prevent the beads from falling off the bottom end by creating a swirl or knot with the pipe cleaner. And then let the children slide the beads on. I helped the 2 year olds put a couple on and they pretty much had it figured out from there.

If you use yarn, be sure to tape the end they will be using to slide on the beads. It will keep it from fraying.

For little wrists wrap the extra pipe cleaner around their wrist and then wrap each end around the section of bracelet it is near (see top picture). This will keep it the size you want and keep the beads from falling off.

**Make sure to leave the bracelet big enough to take on and off their wrist easily AND make sure to pinch in the very ends of the pipe cleaner when finished. They tend to pinch and scratch skin if not tucked away properly.


Variations:
  • Make an animal or a crown instead of a bracelet. My son combined a few pipe cleaners to make his own version of an animal (see above picture).
  • If you do not have any beads use a Fruit Loop/Cheerios type cereal or make some colored noodles and use those to create something.  

Enjoy!

Homemade Watercolor Paint


My daughter is our little artist. She really enjoyed the Chalk Paint we made, but she wanted to bring out the nicer (and smaller) paint brushes. So, I mixed up a smaller amount of the Chalk Paint recipe and let her at it with a fine tipped paint brush. It worked just as good as one of those store bought watercolor trays, but better! Better because it took out the step of having to dip the paint brush in water. That step always complicated things by making huge wet holes in the paper and then she would get really frustrated. She loves this and keeps asking to do it all the time!


This is my son's work


What You Need:

  • Cornstarch
  • Water
  • Food coloring
  • Container(s) - cupcake tin, mini cups, empty egg carton, etc
  • Paintbrush or mini sponges

Directions:

Step 1: Combine 1 part water and 1 part cornstarch. Stir together. I used a total of 1 T. water and 1 T. cornstarch.


Step 2: Divide up mixture into mini containers/cups. The egg carton works well for me, so I don't have to keep washing the cupcake tin. 


Step 3: Add one drop of food coloring to each container.


Step 4: Paint your heart out! You may have to add a little water if your child paints for a long time.


 Using the egg carton worked great! Note: The lighter colors are not as fun.


Variations:
  • If you want a custom color, like orange, you will want to prepare each color/container or mixture separately instead of all together at once. Double the water you want per container and add one drop red, one drop yellow. Then take the half that water and make your cornstarch/water mixture individually for each cup.
    • This also works well to delude the colors to get a more pastel look. 

  • If you do not have paint brushes or do not trust your kids with your nice ones, try using Qtips. They worked pretty good and it didn't matter if the kids were rough with them. We used one for each color to make it easier for more than one artist painting at a time.


Warning: The colors turn out really bright and look wonderful that way, but they may stain more.


Enjoy!!!


How To Make A Kite - The Easy Way

(Don't forget to send in your Summer Fun Challenge entries.
It doesn't take long and it is a bunch of fun! And remember, it can be super simple. Just do something with "sticks" and then follow the entry instructions here.)


This is not your typical kite, but it is simple to make. My kids had fun making it and playing with it. It was a kite they could actually fly on their own and it did not matter if they lost it or broke it. They loved it!

Here's what you need:
  • Plastic grocery sack
  • String, yarn or ribbon
  • Paper streamers
  • Stapler

Directions:

Step 1: Cut strips of paper streamers and staple them to the bottom of the plastic grocery sack.


Add as many as you like!


Step 2:  Cut some string and tie your string of choice around the sack handles. I used yarn at first and eventually found some ribbon. You will have to play with the length, but I think around 3 to 4 feet works nice for younger children because they can then get it up in the air easier. The longer length, it seemed, had them dragging it more (see video below - which shows them with the longer length).


Step 3: Go outside and have some fun running around!


Here is a quick video demo of the project... sometimes pictures are just not enough! This is my first video tutorial, so let me know if it helps.


Enjoy!

Indoor Fun with Fishing

My son has been begging to go fishing for months! I saw "Counting Felt Fish" on Counting Coconuts and decided today was a perfect day to go fishing inside. The weather has not been agreeing with his intense want and we needed a fun inside activity to keep the kids busy while it snowed outside (someone needs to tell Mother Nature that it is almost the middle of May!). It took me less than 30 minutes during their naps to get everything ready and it kept the two entertained for at least an hour! We had  a lot of fun! Here is what you need:


Items Needed
  • Fish made from card stock, felt or fabric (and then stuffed)
  • A pole (stick, bat, long wooden spoon, etc)
  • String
  • Magnet
  • Paper clips, washers or a stapler
  • Scissors
  • Permanent marker/pen
  • Strong tape or hot glue gun
** see additional ideas at the bottom

Directions

1. Trace your fish and cut them out. I made our fish out of card stock simply because that is what I had on hand already. I used cookie cutters and traced them out on the card stock. Originally I was going to print a clip art drawing from online and trace that, but then I remembered I had animal shaped cookie cutters that had lots of different fish.


2. Attach paper clips to fish. If your magnet is strong enough, staples will work, too.


3. Attach string to magnet using strong tape or a hot glue gun. I think the magnets I had to choose from were to either too strong or too weak.  The magnet that probably work best are in between the strengths I have. They are the size of a penny and my kids like to stick everything in their mouths still, so I have avoided those in our house.


4. Attach string to your pole by tying it for a temporary pole or glue gunning for a more permanent pole. Don't have a stick? Use what you have around. I was going to use my sons baseball bat and a long wooden spoon for their poles until I found 2 sticks in our garage. I even considered using the vacuum extension pole (that's a little embarrassing to admit, but it is what I have!)


Additional Ideas for Fun
  • Have your children sort them by color as they are "catching" them.
  • Draw shapes, letters, numbers and have the children identify them and/or sort them.
  • Draw items on each fish that will allow to count what they see (i.e. 3 stars, 1 circle).
    • You can also have them group their catches by numbers.
  • Draw the letters of their name(s) on different fish and have them find all the letters to their name.

Things That Did Not Work
  • The magnets you get from advertisers were not strong enough.
  • Tying the string on a stick. Glue it or cut a slight groove into the stick (and then tie it) if you do not want to be constantly retying the string.
  • A shorter string seemed to work better than a really long string. It is easier for them to guide. And by shorter, I mean enough length so that there is little slack when your child has the pole in the air and the magnet on the ground.

Someday I'll make some fish out of felt, but for now I am perfectly happy with these fish and so our my kids!


Have fun!

Lilly Pad Hop

It snowed again today and I wanted to do something fun that could use up some of the kiddos energy before bed. I also wanted to vacuum out the couches, so this activity helped us do both! This is simple and fun...of course!

What you need:

  • Cushions, pillows, pieces of rug or something like that - these will be your "Lilly Pads" (you can also call it your "Lava Rocks" or whatever else gets your child's imagination going!)

  • At least one child full of energy

Directions:

Layout out your "Lilly Pads" just far enough apart that your child(ren) can reach the next one when they jump. Next, let them have fun! See, I told you this was a simple activity! Fun and simple!

You can barely see it, but that is the look of pure joy on my daughter's face. They were having a blast!


If They Need Some Ideas:

  •  you can have them do the caterpillar jump, where they reach with their hands first and then bring their legs over

  • Bring in a little chair or bench and have them hop up on it, under or over it before jumping on the next "Lilly Pad"

  • Pretend to be an animal

  • Join in! For some reason it is so funny to have Mom or Dad join in on the jumping fun.

They like the caterpillar walk.


Benefits of This Activity

  • By jumping and bouncing they are providing deep pressure on their muscles and joints.

  • Working on eye-hand (or more like feet) coordination as they judge the right distance to reach for between each "Lilly Pad"

  • Learning a little cooperation when playing with other children and their imaginations.

  • Practicing turn taking.

  • Mom gets to clean the couches...okay, maybe this one is just for me!
My son was perfectly content running and jumping back and forth and he was pretty tuckered out afterwards!


Go have some fun!

What's On Your Computer?

I have been a clomplete slacker this past week! I have been all wrapped up in trying to make my summer plans (and to be honest, a bit too antzy to sit at the computer with our weather highs and lows) that I lost track of my 2 posts a week goal. I have been collecting stuff to post, so I will have to catch up!

Today I thought I would share a few programs/sites that we have been enjoying lately.

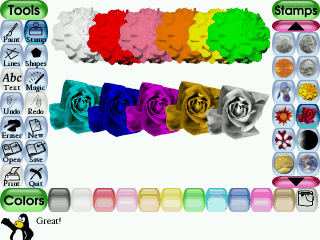
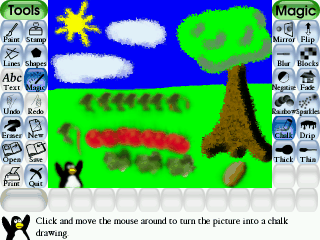
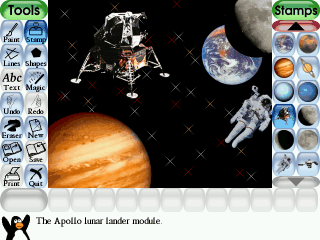
The First is Tux Paint  and it is FREE! If your child knows how to use a mouse then they will love this! It is great for any age that likes to doodle. My son will stay busy on it for at least 10 minutes and if I'm lucky 20. It has lots of tools that your child can use to create anything they would like.  Most of the time my sons pictures are a bunch of scribbles, but right now he discovered the Rubber Stamp Tool and is having a blast with all of its shapes.


They can also create fun like this


Or even this...probably for the more advanced hands!


The Best Part about this is that your child can't click out of it by hitting the wrong key on the key board. You have to go to the "Quit" button on the right side of the Tool Bar. No more worrying about whether they are changing your desktop while you are trying to get dinner ready!


Second, is Preschool Pioneer.  You probably already know about this site, but just in case I will mention it. We just discovered this within the last week and my son, since he has learned how to master the mouse, loves to click around and explore all the sites. What this site does is link up all the other educational sites by categories (letters, numbers, me, watch, me, etc), as well as it gives parents resources, like activity calendars (I'm going to have to check that out!). It links to PBS and other sites. It saves me the time of having to go through all the sites and figuring out which games/activities will work for my kids. My daughter is still learning to navigate the mouse, but still has fun helping her brother. Check it out and let me know what you think!

Last, is SharpKeys. One of the most frustrating things for me is when my kids start hitting the keyboard and start opening screens and programs that I have never seen. Sometimes they even turn the computer off when I am in the middle of typing something. Ugh! My brother-in-law uploaded this program to my computer and I love it! It even helps for those times when the kids are playing a computer game and they keep missing the keyboard and hitting the windows key and stopping their game.
What Sharpkeys does is that it allows you change the reaction a certain key has or even turn the key off, so it has no response. My kids always hit the Windows key to the left of the space bar so, I turned that key's response off. Problem solved!

Once you download the software and open it. All you will do is click on the "ADD" button on the bottom. Another box will open. Choose the key you want to change from the left column and choose the response you want it to have on the right side. Then click okay. (hmm...this is starting to sound like it would be a pretty good joke to pull on someone!)

I know there are other programs out there that have been recommended, but since I have not seen a recommendation from someone I know or a site that I am comfortable with, I will not try those other ones.

Warning: I recommend the program, but not his blog...it uses foul language and such, so don't waste your time!


Site design by Fabulous K Creative | Powered by Blogger